Why Choose an Aluminum Pergola: Design, Durability, and DIY Advantages
Aluminum pergolas blend sleek design with exceptional durability, offering homeowners a low-maintenance, long-lasting outdoor structure. Research indicates aluminum pergolas require 63% less annual maintenance than wood alternatives (Outdoor Living Report 2023), and their lightweight construction simplifies DIY installation without sacrificing strength.
What Makes an Aluminum Pergola Ideal for DIY Projects
Prefabricated aluminum kits streamline assembly with pre-cut, numbered components and tool-free connectors. Unlike wood, aluminum doesn’t splinter or warp, making it beginner-friendly. It’s also 60% lighter than cedar, significantly reducing physical effort during setup (Material Science Journal 2023).
Key Components of a Freestanding Aluminum Pergola Kit
Standard kits include:
- Powder-coated aluminum posts (rust-proof)
- Interlocking rafters with UV-resistant finishes
- Adjustable brackets for uneven surfaces
- Anchoring systems for concrete or soil
Modular designs allow customization of roof pitch and beam spacing using basic tools.
Aluminum vs. Wood Pergolas: Comparing Long-Term Maintenance and Weather Resistance
Aluminum outperforms wood in durability and upkeep:
| Factor | Aluminum Pergola | Wood Pergola |
|---|---|---|
| Annual upkeep cost | $45 | $220 |
| Lifespan (years) | 25–40 | 8–15 |
| Weatherproofing | Built-in | Annual seal |
Aluminum withstands 120 mph winds and resists rot, while untreated wood degrades 8x faster in humid conditions (Construction Materials Review 2023).
Site Preparation and Foundation Setup for Stable Installation
Choosing the Right Location: Sun Exposure, Drainage, and Structural Clearance
Find a flat spot that's at least ten feet away from structures and trees. Getting around six to eight hours of sun each day works best for making good use of shade later on. To check how well water drains, just pour some onto the ground. If puddles stick around after about fifteen minutes, it's time to fix things up with gravel or install those French drain systems people talk about so much these days. Watch out for dips in the landscape where water tends to gather too. Even though aluminum doesn't rust easily, standing water can still cause problems over time, especially during winter months when ice forms.
Measuring and Marking for Square, Level Layout
The old reliable 3-4-5 triangle trick works great for getting those square corners right. Just measure out 3 feet along one side, then 4 feet on the next side, and if the diagonal between those marks comes out exactly 5 feet, congratulations your corner is square! When working on bigger projects though, grabbing a laser level makes life much easier for checking everything lines up properly. Once the layout looks good, drive stakes into each corner spot and run mason's lines between them so we can see the whole footprint clearly. Small slope issues under about 5 degrees can usually be fixed with some wooden shims tucked underneath. But if the ground is really off balance, it's time to call in the heavy equipment for proper regrading before proceeding further.
Digging Footings and Installing Concrete Anchors or Post Bases
Holes need to be between 24 and 36 inches deep, going below where frost forms in colder areas. Use either a hand auger or powered digging tool for this job. When filling these holes, use 4000 psi concrete inside Sonotubes or existing footings already prepared. Make sure to place those galvanized metal pieces during pouring so everything stays straight and properly positioned. If installing on flat ground, first pack down about six inches worth of broken rock beneath where the base plates will sit. Let all that set for around two to three days before actually mounting the vertical supports onto them.
Assembling the Aluminum Pergola Frame: Tools, Techniques, and Alignment
Essential Tools and Safety Gear for Smooth Frame Assembly
Gather these essentials:
- Rubber mallet (protects aluminum during alignment)
- 2m laser level (ensures precise leveling)
- Cut-resistant gloves and safety goggles (prevent injury from sharp edges)
Using proper tools reduces assembly errors by 63% compared to improvised methods (2023 DIY Construction Survey).
Modular Frame Construction: Connecting Beams, Posts, and Brackets
Modern kits feature numbered T-slot beams and cam-lock brackets that assemble without welding. Follow these steps:
- Insert post ends into base plate receivers
- Connect crossbeam tabs to vertical post slots
- Secure joints with M10 corrosion-resistant bolts
This system enables 85% faster assembly than traditional wood joinery (2024 Outdoor Structures Benchmark).
Installing Vertical Posts and Securing to Anchors on Concrete or Ground
For soil installations, drive galvanized ground spikes 24 inches deep. On concrete, use concrete anchor sleeves set in cured footings. Use integrated height markers on posts to adjust for terrain slope and maintain uniform elevation.
Ensuring the Structure is Square, Level, and Plumb Before Final Fixing
Check three key alignments:
| Check | Tolerance | Tool |
|---|---|---|
| Horizontal level | ±2mm/m | Laser level |
| Post verticality | ±1° off plumb | Digital inclinometer |
| Diagonal equality | ±3mm difference | Steel measuring tape |
Discard any component visibly warped beyond 0.5% of its length.
Reinforcing Joints and Connections for Maximum Stability
Apply UV-resistant silicone sealant to bolt threads before tightening to prevent corrosion. In high-wind areas (75mph), install corner gusset plates at beam intersections to boost load capacity by 40%.
Installing the Roof System: Rafters, Louvers, and Weatherproofing
Attaching Rafters and Crossbeams for Uniform Shade Coverage
Secure aluminum rafters to horizontal beams using corrosion-resistant fasteners, spacing them 12–16 inches apart for optimal shade and structural balance. Align crossbeams perpendicularly using pre-drilled holes and a carpenter’s square to maintain consistent spacing.
Adding Adjustable Louvered Roofs for Custom Sun Control
Many kits include louvers that rotate 0–150 degrees via crank or motorized system. Position blades parallel to prevailing winds to improve rain runoff. Attach linkage mechanisms with stainless steel pins and ensure end caps are sealed to keep out debris.
Sealing Joints and Gaps to Enhance Weather Resistance
Apply butyl tape or silicone sealant to:
- Rafter-to-crossbeam connections
- Mounting bracket gaps
- Edges of louver blades
Sealed joints reduce wind-driven rain infiltration by 72% (Outdoor Structure Weatherproofing Study).
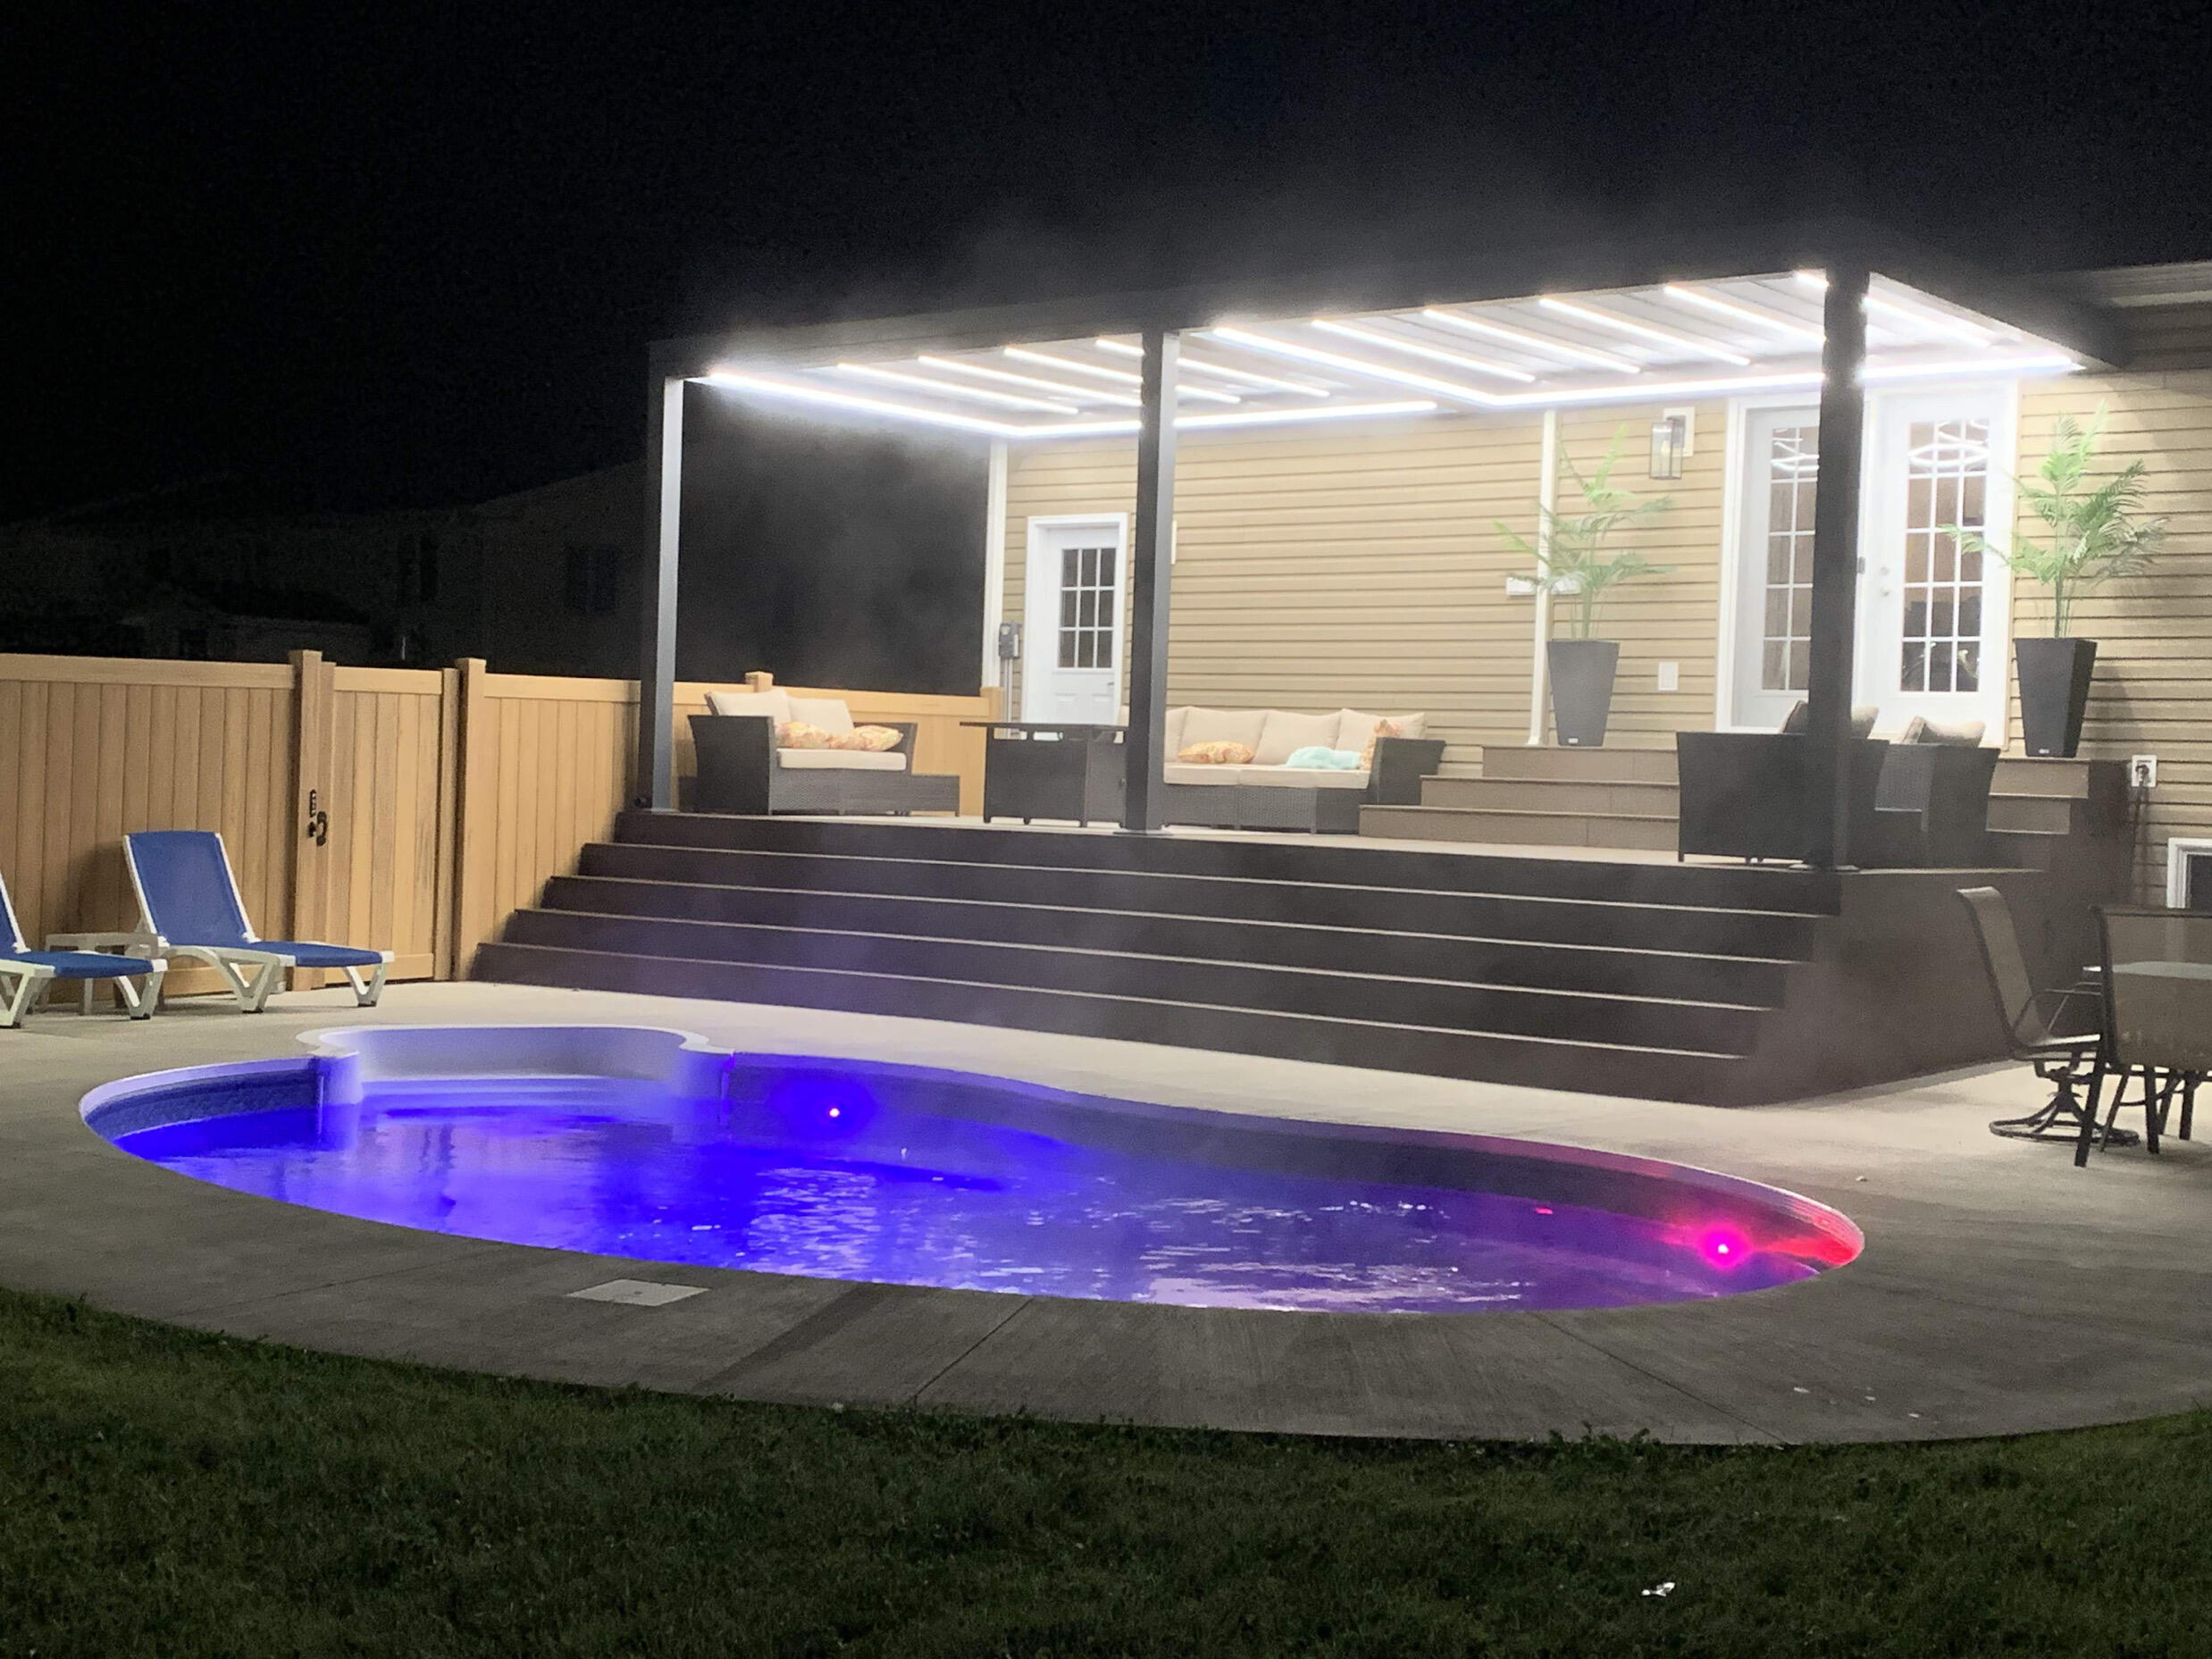
Optional Add-Ons: Lighting, Curtains, and Climbing Plants Integration
Enhance comfort and function with:
- Low-voltage LED strips under rafters (space every 4–6 ft)
- Weather-resistant curtains on sliding tracks for privacy
-
Mesh panels to support climbing plants (limit to species under 15 lb/ft)
Always confirm add-ons are within your pergola’s load limits before installation.
Final Inspection and Long-Term Stability Checks
Inspecting and Tightening All Fasteners After Initial Settling
Wait 72 hours after assembly to allow natural settling. Then, inspect all bolts, screws, and brackets with a 9/16" wrench. According to the Building Performance Journal 2023, 63% of outdoor structure failures stem from loose fasteners due to thermal expansion. Focus on high-stress zones like crossbeam-to-post joints.
Verifying Wind Resistance and Structural Integrity in Exposed Areas
Test lateral stability by applying 50 lbs of pressure to opposite posts. Measure deflection with a laser level—any movement exceeding 1/4" per 8 feet of height indicates the need for reinforcement. In hurricane-prone regions (Wind Zones III/IV), upgrade anchors with epoxy-set threaded rods to achieve 150+ mph load capacity.
Routine Maintenance Tips to Extend the Life of Your Aluminum Pergola
Perform biannual maintenance to preserve performance:
- Clean surfaces with a pH-neutral cleaner and soft brush
- Clear debris from louver tracks using compressed air
- Lubricate moving parts with dry silicone spray
- Inspect powder coating for chips larger than 1/8"
Repair damaged coatings within 14 days to prevent oxidation and maintain corrosion resistance.
FAQs about Aluminum Pergolas
Why is aluminum preferred over wood for pergolas?
Aluminum is preferred due to its superior durability, lower maintenance needs, and resistance to severe weather conditions compared to wood.
Can I install an aluminum pergola myself?
Yes, aluminum pergolas are designed for easy DIY installation, often with prefabricated kits that include necessary tools and instructions.
How long does an aluminum pergola last?
An aluminum pergola has a lifespan of 25–40 years, significantly longer than wooden alternatives.
What maintenance is necessary for aluminum pergolas?
Biannual cleaning, debris clearance, and lubrication of moving parts are recommended for maintaining aluminum pergolas.
Are aluminum pergolas customizable?
Yes, many aluminum pergola kits offer modular designs allowing for customization in design and add-ons like lighting and plants.
Table of Contents
- Why Choose an Aluminum Pergola: Design, Durability, and DIY Advantages
- Site Preparation and Foundation Setup for Stable Installation
-
Assembling the Aluminum Pergola Frame: Tools, Techniques, and Alignment
- Essential Tools and Safety Gear for Smooth Frame Assembly
- Modular Frame Construction: Connecting Beams, Posts, and Brackets
- Installing Vertical Posts and Securing to Anchors on Concrete or Ground
- Ensuring the Structure is Square, Level, and Plumb Before Final Fixing
- Reinforcing Joints and Connections for Maximum Stability
- Installing the Roof System: Rafters, Louvers, and Weatherproofing
- Final Inspection and Long-Term Stability Checks
- FAQs about Aluminum Pergolas