

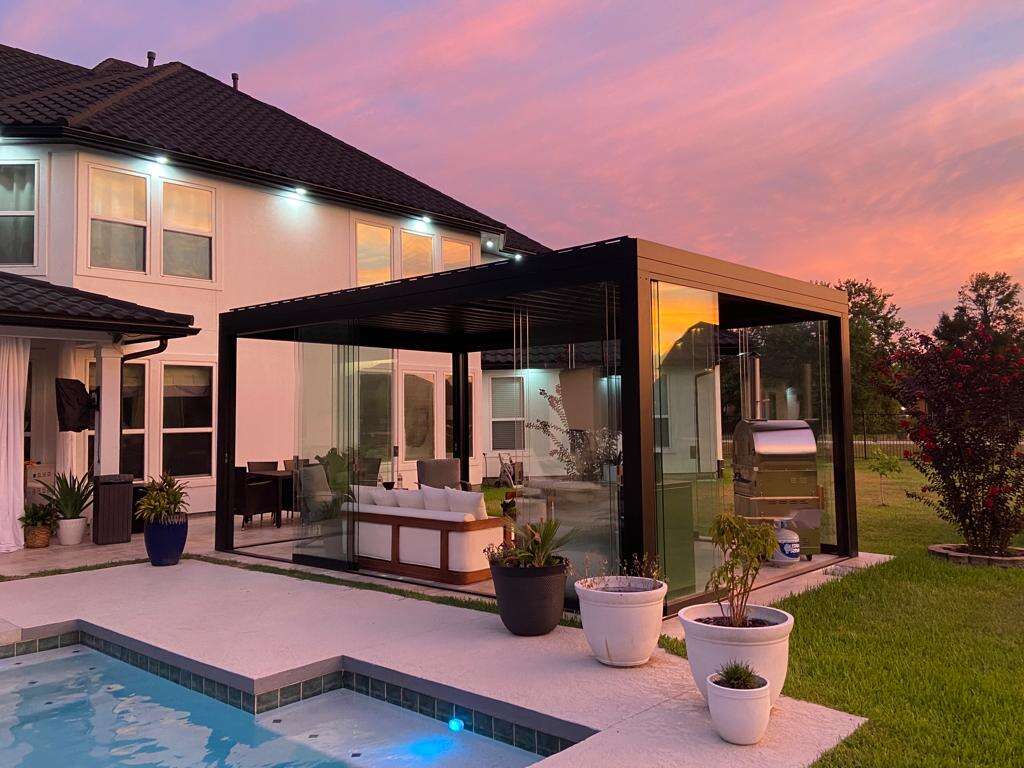
Installing a pergola in your outdoor space can transform your backyard into an elegant retreat, but many homeowners wonder whether they can tackle this project without hiring professional contractors. While a pergola installation may seem daunting at first glance, with proper planning, the right tools, and careful attention to detail, it is entirely possible to complete this project as a DIY endeavor. The key lies in understanding the complexity of your chosen pergola design, your personal skill level, and the specific requirements of your installation site.
Understanding Pergola Construction Basics
Essential Components of a Modern Pergola
A typical pergola consists of several fundamental components that work together to create a stable and attractive outdoor structure. The foundation includes posts or columns that provide vertical support, while horizontal beams create the primary framework. Cross beams or rafters are positioned perpendicular to the main beams, forming the characteristic grid pattern that defines a pergola. Understanding these basic elements is crucial before beginning any installation project, as each component plays a vital role in the overall structural integrity of your pergola.
Modern pergola designs often incorporate additional features such as retractable canopies, integrated lighting systems, or climbing plant supports. These enhancements can significantly increase the complexity of installation but also provide greater functionality and aesthetic appeal. When planning your pergola project, consider which features are essential for your intended use and which might be added later as upgrades.
Material Selection and Preparation
The choice of materials significantly impacts both the installation difficulty and the long-term durability of your pergola. Traditional wood pergolas offer natural beauty and are relatively easy to work with using standard carpentry tools. Cedar and redwood are popular choices due to their natural resistance to insects and weather, while pressure-treated lumber provides affordability with decent longevity. Each material type requires specific preparation techniques and maintenance considerations that should be factored into your installation timeline.
Aluminum and vinyl pergola kits have gained popularity among DIY enthusiasts because they often come with pre-cut components and detailed assembly instructions. These materials require minimal preparation and offer excellent resistance to weather and pests. However, working with metal components may require specialized tools and techniques that differ from traditional woodworking approaches. Consider your existing tool collection and skill set when selecting materials for your pergola project.
Planning Your Pergola Installation Project
Site Assessment and Preparation
Before beginning any pergola installation, conduct a thorough assessment of your chosen location to identify potential challenges or requirements. Check for underground utilities by calling your local utility marking service, as hitting water, gas, or electrical lines during post installation can result in costly damages and safety hazards. Evaluate the soil conditions in your installation area, as different soil types may require specific foundation techniques or additional reinforcement measures.
Consider the proximity of your pergola to existing structures, property lines, and overhead obstacles such as power lines or tree branches. Many municipalities require setback distances from property boundaries and may have height restrictions for outdoor structures. Research local building codes and permit requirements early in the planning process, as some areas require professional oversight or inspections even for DIY installations.
Tool and Equipment Requirements
Successful pergola installation requires a comprehensive set of tools and equipment that extends beyond basic household items. Essential tools include a post-hole digger or auger, level, measuring tape, circular saw or miter saw, drill with various bits, socket set, and safety equipment including gloves and eye protection. Depending on your pergola design and local soil conditions, you may also need concrete mixing equipment, wheelbarrow, and additional specialty tools.
Consider renting or borrowing specialized equipment rather than purchasing items you may only use once. Post-hole augers, concrete mixers, and laser levels can significantly improve the efficiency and accuracy of your installation but represent a substantial investment for a single project. Many hardware stores and equipment rental companies offer competitive rates for weekend or weekly tool rentals, making professional-grade equipment accessible to DIY enthusiasts.
Step-by-Step Installation Process
Foundation and Post Installation
The foundation phase represents the most critical aspect of pergola installation, as errors at this stage can compromise the entire structure. Begin by marking the exact locations for each post using spray paint or stakes and string lines, ensuring all measurements are precise and the layout is perfectly square. Use the 3-4-5 triangle method to verify right angles, and double-check all dimensions before proceeding with excavation.
Dig post holes to the appropriate depth, typically one-third the height of the above-ground post plus six inches for frost protection in colder climates. The width of each hole should be approximately three times the post width to accommodate concrete footings. Set posts in the holes and use temporary braces to maintain perfect plumb alignment while pouring and setting concrete. Allow concrete to cure for at least 24 hours before continuing with the assembly process.
Frame Assembly and Beam Installation
Once the posts are securely set and the concrete has fully cured, begin installing the main support beams that will form the primary framework of your pergola. Use a water level or laser level to ensure all beam connections are perfectly horizontal, as even minor variations can result in structural problems and an unprofessional appearance. Pre-drill all bolt holes to prevent splitting and ensure clean, precise connections between components.
Install rafters or cross beams according to your design specifications, maintaining consistent spacing for both aesthetic appeal and structural integrity. Many pergola designs incorporate decorative end cuts or profiles on the rafters, which should be completed before installation to ensure uniformity. Take time to verify that all connections are secure and properly aligned before considering the frame assembly complete.
Common Challenges and Solutions
Dealing with Uneven Terrain
Sloped or uneven ground presents one of the most common challenges in pergola installation, but several effective solutions can accommodate these conditions. Stepped installations allow the pergola to follow the natural contour of the land while maintaining level beam connections. This approach requires careful calculation of post heights and may necessitate custom cutting of support posts to achieve proper alignment.
Alternative solutions include selective grading of the installation area or the use of adjustable post anchors that can accommodate minor variations in ground level. For significant slopes, consider incorporating retaining walls or terracing to create a more suitable installation surface. These modifications may increase the complexity and cost of your project but can result in a more professional and stable final installation.
Weather and Timing Considerations
Weather conditions significantly impact the success and timeline of pergola installation projects. Concrete setting requires dry conditions and appropriate temperatures, typically between 50 and 85 degrees Fahrenheit for optimal curing. Plan your installation to avoid periods of extreme weather, and be prepared to adjust your schedule if conditions become unfavorable during critical phases of the project.
Allow adequate time for each phase of installation, particularly concrete curing and any required inspections. Rushing through critical steps can compromise the quality and safety of your pergola installation. Consider breaking the project into multiple weekends if necessary, ensuring each phase is completed properly before proceeding to the next stage.
Cost Considerations and Budget Planning
Material and Tool Investment
The total cost of a DIY pergola installation varies significantly based on size, materials, and design complexity. Basic wood pergola kits typically range from several hundred to several thousand dollars, while custom designs using premium materials can cost significantly more. Factor in the cost of tools, hardware, concrete, and any required permits when developing your project budget.
Compare the total DIY cost against professional installation quotes to determine the potential savings. While professional installation eliminates the time investment and learning curve associated with DIY projects, many homeowners find that building their own pergola provides substantial cost savings and personal satisfaction. Consider the long-term value of tools and skills gained through the DIY experience when evaluating the overall project economics.
Hidden Costs and Contingency Planning
Budget for unexpected expenses that commonly arise during pergola installation projects. Site preparation may require additional materials or equipment rental, particularly if soil conditions are challenging or utility lines need to be marked and avoided. Building permit fees, inspection costs, and potential code compliance modifications should be included in your initial budget planning.
Establish a contingency fund of approximately 15-20% of your estimated project cost to handle unforeseen complications or material price fluctuations. This buffer helps ensure project completion without financial strain and allows for quality upgrades or modifications that may become apparent during the installation process.
Safety Considerations and Best Practices
Personal Safety Equipment and Procedures
Pergola installation involves multiple safety risks including cuts from power tools, injuries from heavy lifting, and falls from ladders or scaffolding. Always wear appropriate personal protective equipment including safety glasses, work gloves, steel-toed boots, and hearing protection when using power tools. Ensure all electrical tools are properly grounded and consider using battery-powered alternatives to eliminate extension cord hazards.
Never work alone during critical phases of installation, particularly when lifting heavy beams or working at elevation. Having an assistant present not only improves safety but also increases efficiency and accuracy during assembly processes. Establish clear communication procedures and ensure all helpers understand their roles and safety responsibilities before beginning work.
Structural Safety and Code Compliance
Research and comply with all applicable building codes and structural requirements for pergola installations in your area. These regulations exist to ensure public safety and may specify minimum foundation depths, structural connection requirements, and material specifications. Failure to comply with local codes can result in fines, forced removal, or liability issues in case of structural failure or property damage.
When in doubt about structural requirements or code compliance, consult with local building officials or consider hiring a structural engineer for design review. The cost of professional consultation is minimal compared to potential problems resulting from inadequate structural design or code violations. Proper documentation of compliance efforts can also be valuable for insurance purposes and future property sales.
Maintenance and Long-term Care
Preventive Maintenance Strategies
Regular maintenance ensures your pergola remains safe, attractive, and functional for many years after installation. Develop a seasonal maintenance schedule that includes inspection of all structural connections, cleaning of surfaces, and application of protective finishes as needed. Wood pergola structures typically require annual staining or sealing to prevent weather damage and maintain appearance.
Monitor your pergola for signs of insect damage, particularly in areas with active termite or carpenter ant populations. Early detection and treatment of pest problems can prevent significant structural damage and costly repairs. Keep vegetation trimmed away from pergola components to prevent moisture retention and reduce pest habitat around the structure.
Seasonal Care and Weather Protection
Different climates present unique challenges for pergola maintenance and care. In areas with harsh winters, remove snow accumulation promptly to prevent structural overloading, and consider applying additional protective treatments before the winter season. In regions with intense sun exposure, UV-resistant finishes and regular inspection for heat-related expansion or contraction damage become more important.
Document your maintenance activities and keep records of any repairs or modifications made to your pergola structure. This information proves valuable for warranty claims, insurance purposes, and future maintenance planning. Consider creating a digital photo record of your installation process and ongoing maintenance activities for reference.
FAQ
What skill level is required to install a pergola yourself
Installing a pergola yourself requires intermediate DIY skills including basic carpentry, concrete work, and familiarity with power tools. While beginners can complete simple pergola kits with careful attention to instructions, more complex custom installations may require advanced skills in measuring, cutting, and structural assembly. Previous experience with outdoor construction projects significantly improves success rates and installation quality.
How long does it typically take to install a pergola
A typical pergola installation takes 2-4 days for experienced DIY enthusiasts, depending on size and complexity. Simple kit installations may be completed in a single weekend, while custom designs requiring extensive site preparation or complex features can take a week or more. Weather conditions, concrete curing time, and permit approval processes can extend the timeline significantly.
Do I need a building permit for pergola installation
Building permit requirements for pergola installation vary significantly by location and structure specifications. Many municipalities require permits for permanent structures over certain size thresholds or when electrical components are included. Contact your local building department early in the planning process to determine specific requirements and avoid potential legal complications or forced removal.
What tools are absolutely essential for pergola installation
Essential tools for pergola installation include a post-hole digger, level, measuring tape, circular saw, drill with bits, socket set, and basic safety equipment. Additional helpful tools include a laser level for precision alignment, concrete mixer for efficient foundation work, and clamps for holding components during assembly. Many specialized tools can be rented rather than purchased for single-use projects.